
TM 5-3805-293-23-4
0245
REMOVAL CONTINUED
000245
WARN I N G
If lowering scarifier with this procedure, use extreme caution. Keep clear of scarifier.
Failure to follow this warning may cause injury to personnel.
N OT E
If scarifier is in a raised position, weight may need to be added in order to lower the
scarifier while releasing pressure.
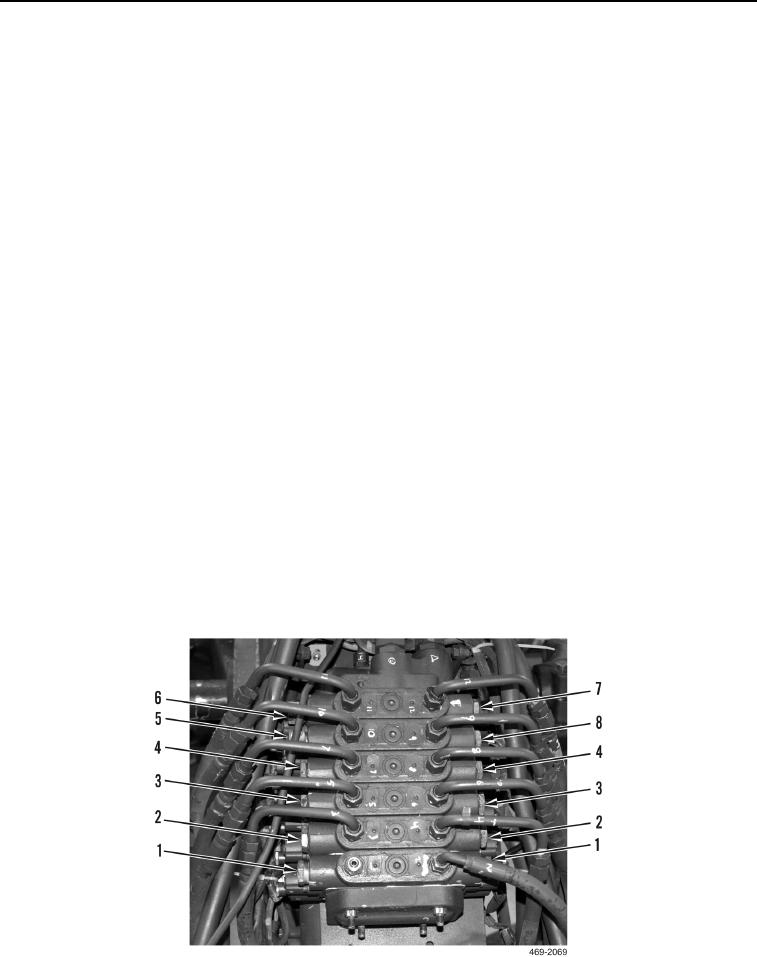
7. Slowly turn scarifier lock valves (Figure 4, Item 1) three complete turns. Allow pressure to release.
8. Tighten scarifier lock valves (Figure 4, Item 1). Hand tighten only.
9. Slowly turn wheel lean lock valves (Figure 4, Item 2) three complete turns. Allow pressure to release.
10. Tighten wheel lean lock valves (Figure 4, Item 2). Hand tighten only.
11. Slowly turn circle drive lock valves (Figure 4, Item 3) three complete turns. Allow pressure to release.
12. Tighten circle drive lock valves (Figure 4, Item 3). Hand tighten only.
13. Slowly turn centershift lock valves (Figure 4, Item 4) three complete turns. Allow pressure to release.
14. Tighten two centershift lock valves (Figure 4, Item 4). Hand tighten only.
15. Slowly turn sideshift lock valve (Figure 4, Item 8) three complete turns. Allow pressure to release.
16. Tighten sideshift lock valve (Figure 4, Item 8). Hand tighten only.
17. Slowly turn sideshift relief valve (Figure 4, Item 5) three complete turns. Allow pressure to release.
18. Tighten sideshift relief valve (Figure 4, Item 5). Hand tighten only.
19. Slowly turn blade tip lock valve (Figure 4, Item 7) three complete turns. Allow pressure to release.
20. Tighten blade tip lock valve (Figure 4, Item 7). Hand tighten only.
21. Slowly turn blade tip relief valve (Figure 4, Item 6) three complete turns. Allow pressure to release.
22. Tighten blade tip relief valve (Figure 4, Item 6). Hand tighten only.
Figure 4. Wheel Lean Circuit.
0245
Change 1

