
TM 5-3805-293-23-4
0226
REMOVAL CONTINUED
Left and Right Front Access Door
000226
N OT E
The procedure to remove the left front andright front access doors is identical. The left
front access door is shown in this procedure.
Note location of washers prior to removal to aid in installation. Thicker washers are used
on door end of door rod.
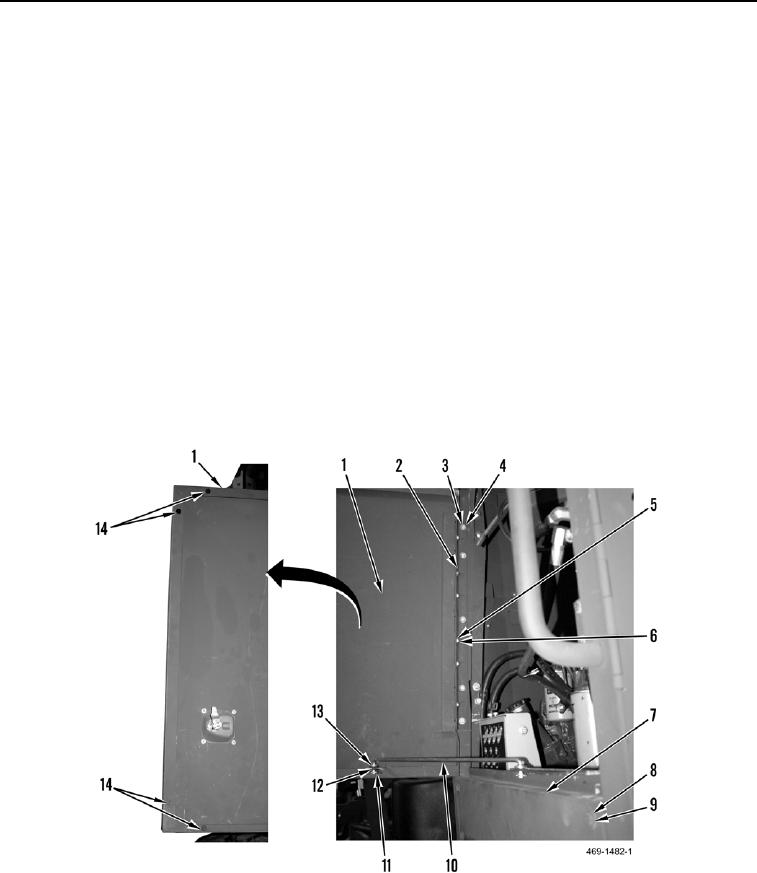
1. Remove three cotter pins (Figure 2, Item 11), washers (Figure 2, Item 12), rubber grommet (Figure 2, Item 13)
and door rod (Figure 2, Item 10) from door (Figure 2, Item 1) and access panel (Figure 2, Item 7). Discard
cotter pins.
2. Remove four bumpers (Figure 2, Item 14) from door (Figure 2, Item 1).
3. Remove six bolts (Figure 2, Item 5), washers (Figure 2, Item 6), and door (Figure 2, Item 1) from door hinge
(Figure 2, Item 2).
4. Remove five bolts (Figure 2, Item 3), washers (Figure 2, Item 4), and door hinge (Figure 2, Item 2) from engine
enclosure.
5. Remove four bolts (Figure 2, Item 8), washers (Figure 2, Item 9) and access panel (Figure 2, Item 7) from
engine enclosure.
6. Clean and inspect front access door and access panel (refer to Cleaning and Inspection in this work package).
Figure 2. Left Front Access Door.
0226
END OF TASK

