
TM 5-3805-293-23-3
0091
REMOVAL
00091
C AU T I O N
Clean area around dipstick tube prior to removing dipstick tube from oil pan. Failure to
follow this caution may result in damage to equipment.
N OT E
Inspect two O-rings on dipstick; replace if damaged.
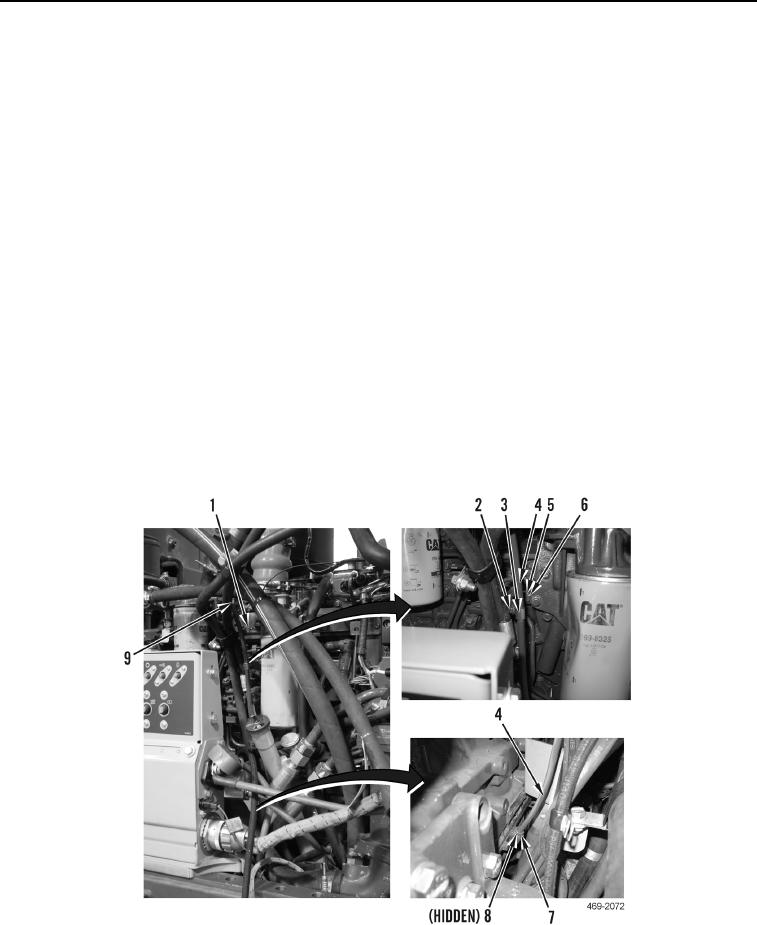
1. Remove engine oil dipstick (Figure 1, Item 9) from engine oil dipstick tube (Figure 1, Item 4).
2. Remove bolt (Figure 1, Item 2) and clamp (Figure 1, Item 3), from bracket (Figure 1, Item 5).
3. Remove bolt (Figure 1, Item 6) and bracket (Figure 1, Item 5) from engine (Figure 1, Item 1).
C AU T I O N
Install cap on oil dipstick tube opening on engine to prevent contamination or debris from
entering engine oil pan. Failure to follow this caution may result in damage to engine.
N OT E
O-ring may not come out with dipstick tube. Ensure O-ring is removed from engine prior to
installing new dipstick tube.
4. Loosen nut (Figure 1, Item 7) and remove engine oil dipstick tube (Figure 1, Item 4) and O-ring (Figure 1,
Item 8) from engine (Figure 1, Item 1). Discard O-ring.
Figure 1. Engine Oil Dipstick.
0091
END OF TASK