TM 5-3805-293-23-3
0090
CLEANING AND INSPECTION
00090
Clean and inspect all components IAW Mechanical General Maintenance Instructions (WP 0346).
END OF TASK
INSTALLATION
00090
1. Install new gasket (Figure 4, Item 5) and oil pan drain adapter (Figure 4, Item 6) on engine.
2. Install two torx bolts (Figure 4, Item 4) on oil pan drain adapter (Figure 4, Item 6). Torque bolts to 16 lb-ft
(22 Nm).
3. Install plug (Figure 4, Item 3) in engine oil pan (Figure 4, Item 1).
4. Install new gasket (Figure 4, Item 2) and engine oil pan (Figure 4, Item 1) on engine.
WARN I N G
Support oil pan until bolts are installed. Failure to follow this warning may result in injury to
personnel.
N OT E
Install breather tube clip in position as marked.
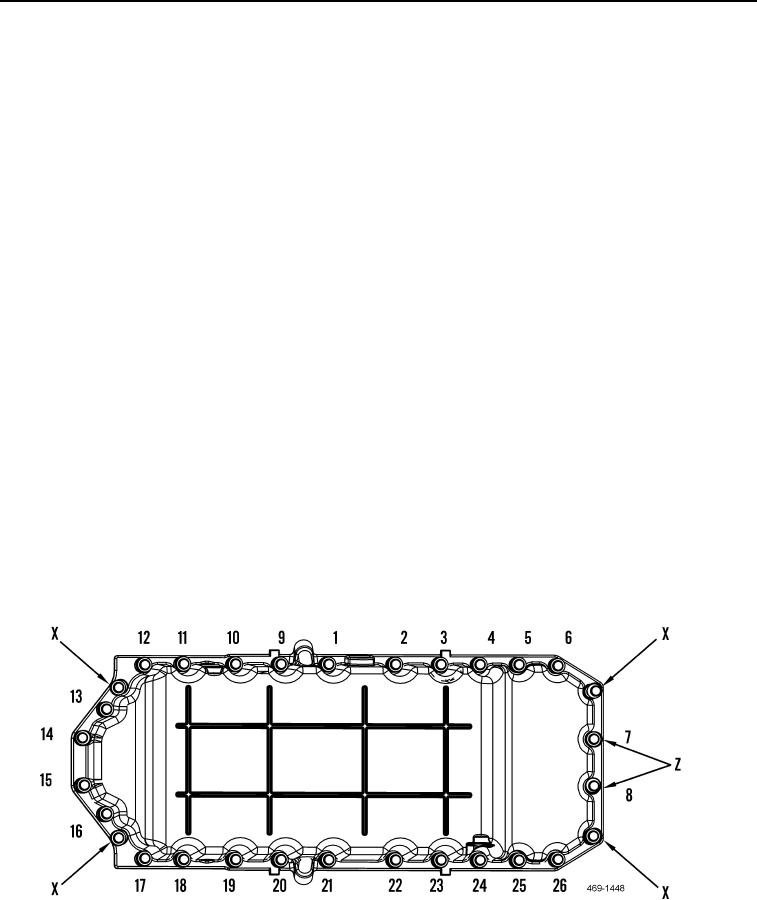
5. Install two short bolts (Figure 4, Item 14) and 28 long bolts (Figure 4, Item 15) on engine oil pan (Figure 4,
Item 1). Torque bolts in sequence to 16 lb-ft (22 Nm).
6. Install new seal (Figure 4, Item 11) and oil level guide tube (Figure 4, Item 9) on engine oil pan (Figure 4,
Item 1). Tighten nut (Figure 3, Item 10).
7. Install bolt (Figure 4, Item 8) and clip (Figure 4, Item 7) on engine.
8. Install two new O-rings (Figure 4, Item 13) on dipstick (Figure 4, Item 12).
9. Install dipstick (Figure 4, Item 12) in oil level guide tube (Figure 4, Item 9).
Figure 3. Engine Oil Pan Torque Sequence.
0090

