POWER TRAIN
DISASSEMBLY AND ASSEMBLY
8.
9.
10.
11.
12.
FINAL DRIVES
TM 5-3805-263-14&P-2
Remove O-ring seal (3) from the housing.
Remove bearing (4) from the shaft.
Remove bolts (5) that hold retainer (6) to the
housing. Remove retainer (6). Also, remove
the shim pack under retainer.
Remove the washer that is between the final
drive housing and retainer (6). The washer is
in three sections.
Install two 5/8”-11 NC forged eyebolts (11)
and nuts in the housing as shown. Put a fork
lift truck in position under the housing.
Install tooling (F) on the lift truck and the
eyebolts.
Pull the outer housing (8) from the inner
housing with tooling (F).
CAUTION: Use care when removing outer hous-
ing so that seal (12) in outer housing is not damag-
ed.
13.
14.
15.
16.
17.
18.
19.
Remove two oscillation bearing rings (9)
from the housings. Remove washer (7) from
the inner housing. Washer (7) is in three
sections.
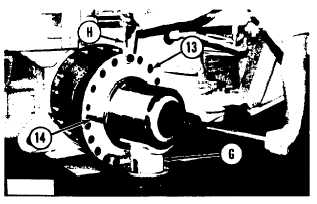
Put tooling (G) and a floor jack in position
under inner housing (13). A rag can be put
between tooling (G) and the housing to
prevent damage to the housing.
Remove nuts (10) and the washers that hold
inner housing (13) to the bevel gear case.
Install two 3/4”-10 NC forcing screws (14)
in the housing. Remove the inner housing
far enough to install tooling (H) on the
housing. Fasten a hoist to tooling (H). Rut
an axle in position in the final drive housing
to help keep the housing in balance.
Install a wire around the forcing screws and
the planet carrier to keep the planet carrier
from falling. Remove inner housing (13) and
the planet carrier. Weight is 360 lb. (163 kg).
Remove the O-ring seal from the inside surface
of inner housing (13). Remove seal (12) only if
it is leaking oil.
Rut the final drive housing in position on
blocks with the planet carrier up. Remove
the wire and the forcing screws from the
housing.
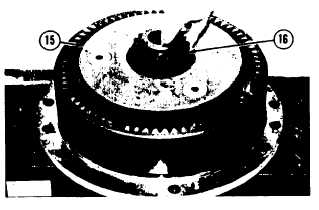
Remove pinion (16) from planet carrier
(15). Fasten a hoist to planet carrier (15)
and remove it. Weight is 90 lb. (41 kg).
2-57


