TM 5-3805-293-23-5
0347
HEAT-SHRINKABLE TUBING (ELECTRICAL INSULATING SLEEVING)
000347
Use heat-shrinkable tubing to insulate soldered and crimped electrical connections.
1. Cut length of new tubing twice as long as connection to be covered.
2. Slide tubing onto wire and out of the way before making electrical connection.
3. After making electrical connection, slide tubing into place over electrical connection.
WARN I N G
DO NOT touch heat-shrinkable tubing for at least 30 seconds after heating. Heat-
shrinkable tubing is hot and will cause burns. Failure to follow this warning may result in
injury to personnel.
4. Using a heat source, apply heat to tubing for approximately 30 seconds, until tubing snugly conforms to shape
of electrical connection.
END OF TASK
RING TERMINAL REPAIR
000347
Use heat-shrinkable tubing when repairing terminals.
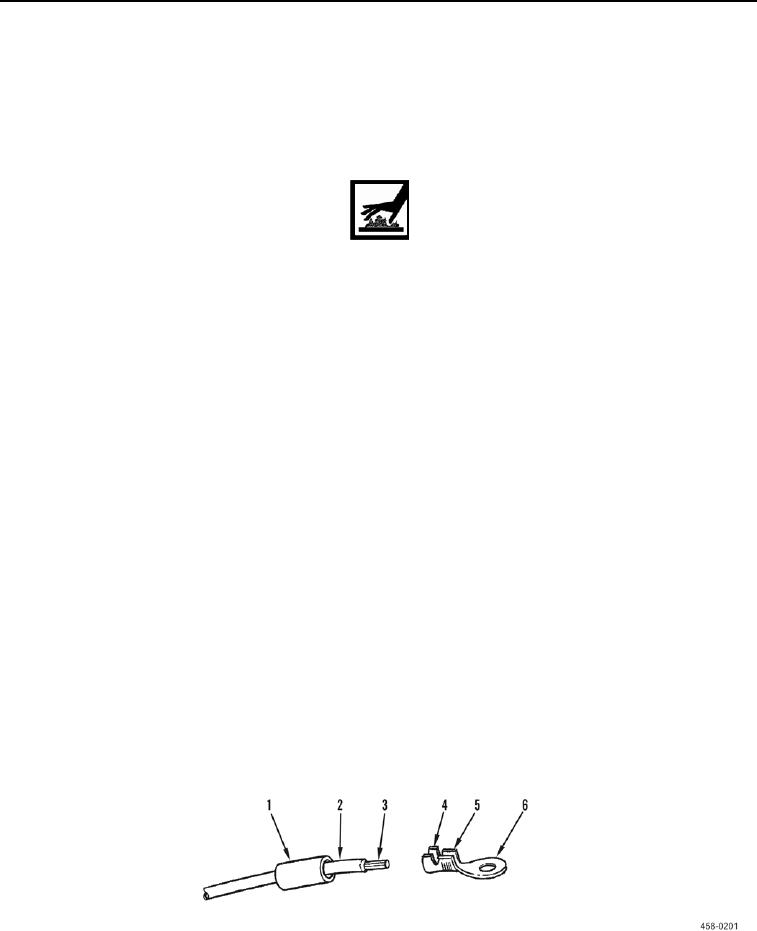
1. Remove ring terminal (Figure 3, Item 6) from wire (Figure 3, Item 2) by cutting through wire just behind tubing
(Figure 3, Item 1). Discard ring terminal.
2. Cut tubing (Figure 3, Item 1) to length sufficient to cover tabs (Figure 3, Items 4 and 5) of ring terminal (Figure
3, Item 6) and 1/4 in. (6 mm) of wire (Figure 3, Item 2).
3. Slide tubing (Figure 3, Item 1) back on wire (Figure 3, Item 2).
4. Using wire stripping tool, strip insulation from wire (Figure 3, Item 2) to expose proper length of metal strands
(Figure 3, Item 3).
5. Using crimping tool, securely crimp tabs (Figure 3, Item 5) of new ring terminal (Figure 3, Item 6) over metal
strands (Figure 3, Item 3).
6. Using crimping tool, crimp tabs (Figure 3, Item 4) of ring terminal (Figure 3, Item 6) over insulation of wire (Fig-
ure 3, Item 2).
7. Slide tubing (Figure 3, Item 1) over tabs (Figure 3, Items 4 and 5) of ring terminal (Figure 3, Item 6).
8. Using a heat source, apply heat to tubing (Figure 3, Item 1) until tubing snugly conforms to ring terminal (Figure
3, Item 6) and insulation of wire (Figure 3, Item 2).
Figure 3. Repairing Ring Terminals.
0347
END OF TASK

