TM 5-3805-293-23-5
0294
REMOVAL CONTINUED
N OT E
Figure 3 shows the left air duct only.
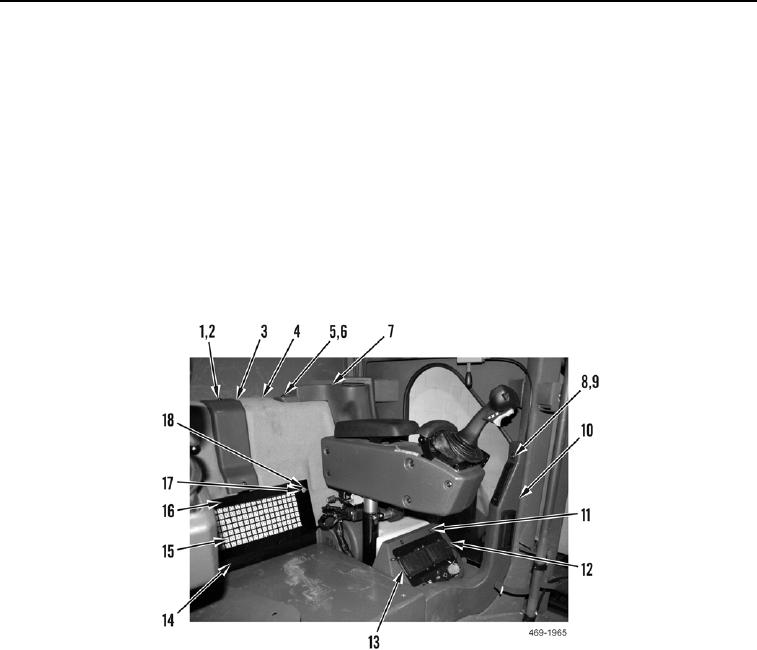
7. Remove two screws (Figure 3, Item 5), washers (Figure 3, Item 6), and air ducts (Figure 3, Item 7) from cab.
8. Remove two screws (Figure 3, Item 8), washers (Figure 3, Item 9), and air ducts (Figure 3, Item 10) from cab.
9. Remove four screws (Figure 3, Item 11) and fuse panel cover (Figure 3, Item 12) from fuse panel (Figure 3,
Item 13). Position fuse panel aside.
10. Remove two screws (Figure 3, Item 1), washers (Figure 3, Item 2), rear bulkhead carpet trim panel (Figure 3,
Item 3), and two carpet panels (Figure 3, Item 4) from cab.
11. Remove two thumbscrews (Figure 3, Item 18), washers (Figure 3, Item 17), grille (Figure 3, Item 16), and air
filter (Figure 3, Item 15) from A/C duct assembly (Figure 3, Item 14).
Figure 3. Cab Air Ducts.
0294

