
TM 5-3805-293-23-3
0094
REMOVAL
00094
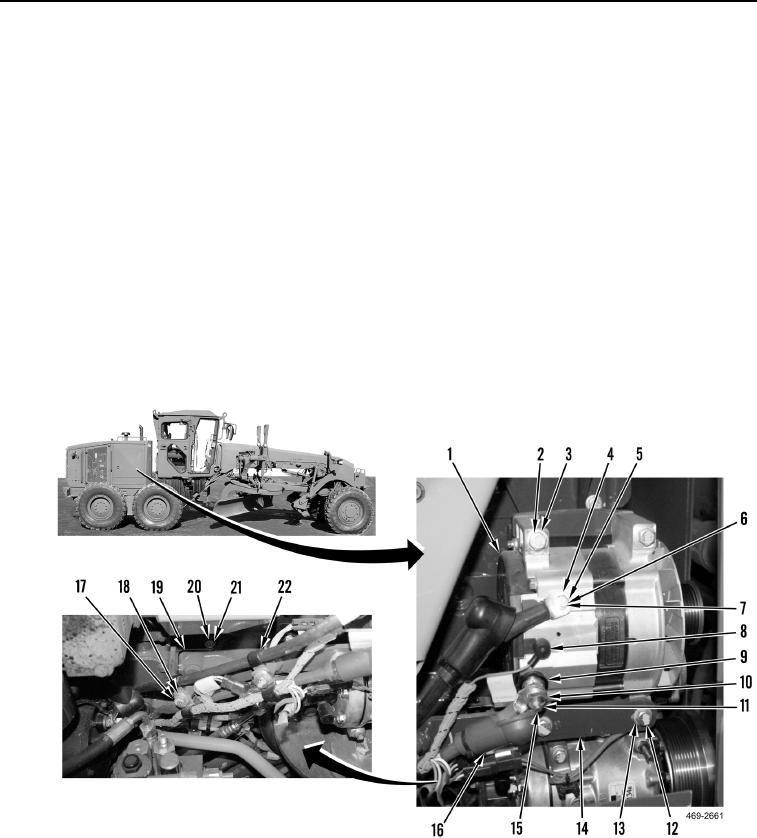
1. Reposition two boots (Figure 1, Item 16) to allow access to electrical connections.
2. Remove bolt (Figure 1, Item 4), washer (Figure 1, Item 5), lockwasher (Figure 1, Item 6), and negative cable
(Figure 1, Item 7) from alternator (Figure 1, Item 1). Discard lockwasher.
3. Disconnect connector (Figure 1, Item 8) from alternator (Figure 1, Item 1).
4. Remove nut (Figure 1, Item 9), washer (Figure 1, Item 10), lockwasher (Figure 1, Item 11), and positive cable
(Figure 1, Item 15) from alternator (Figure 1, Item 1). Discard lockwasher.
N OT E
Remove bracket only if necessary.
Mark position of bolts during removal to aid in installation.
5. Remove two bolts (Figure 1, Item 12), and washers (Figure 1, Item 13) from bracket (Figure 1, Item 14).
6. Remove two bolts (Figure 1, Item 2), washers (Figure 1, Item 3), and alternator (Figure 1, Item 1) from engine.
7. Remove three bolts (Figure 1, Item 17), washers (Figure 1, Item 18) and six clamps (Figure 1, Item 22) from
bracket (Figure 1, Item 19).
8. Remove bolt (Figure 1, Item 20), washer (Figure 1, Item 21), and bracket (Figure 1, Item 19) from engine.
Figure 1. Alternator.
0094
END OF TASK