
TM 5-3805-293-23-4
0226
INSTALLATION CONTINUED
N OT E
Use assistance when installingdoors and panels on machine.
Install washers as noted at removal.
Thicker washers are used on door end of door rod.
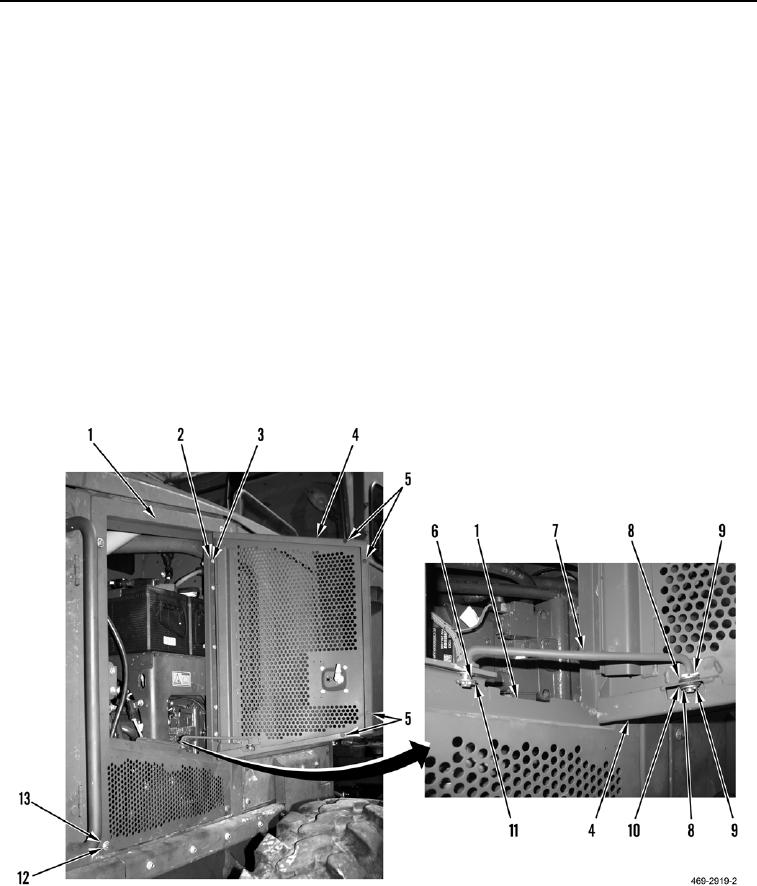
Right Rear Access Door
000226
1. Install door panel (Figure 25, Item 1), four washers (Figure 25, Item 13), and bolts (Figure 25, Item 12) on
engine enclosure.
2. Install door (Figure 25, Item 4), five washers (Figure 25, Item 2), and bolts (Figure 25, Item 3) on engine
enclosure.
3. Install four bumpers (Figure 25, Item 5) on door (Figure 25, Item 1).
4. Install rubber grommet (Figure 25, Item 10) on door (Figure 25, Item 4).
5. Install washer (Figure 25, Item 8), door rod (Figure 25, Item 7), washer (Figure 25, Item 8), and two cotter pins
(Figure 25, Item 9) on door (Figure 25, Item 4).
6. Install door rod (Figure 25, Item 7), washer (Figure 25, Item 6) and new cotter pin (Figure 25, Item 11) on door
panel (Figure 25, Item 1).
Figure 25. Right Rear Access Door.
0226
END OF TASK

