
TM 5-3805-293-23-4
0226
INSTALLATION CONTINUED
Coolant Tank Access Door
N OT E
Install coolant tank access door handle and latch as noted during removal.
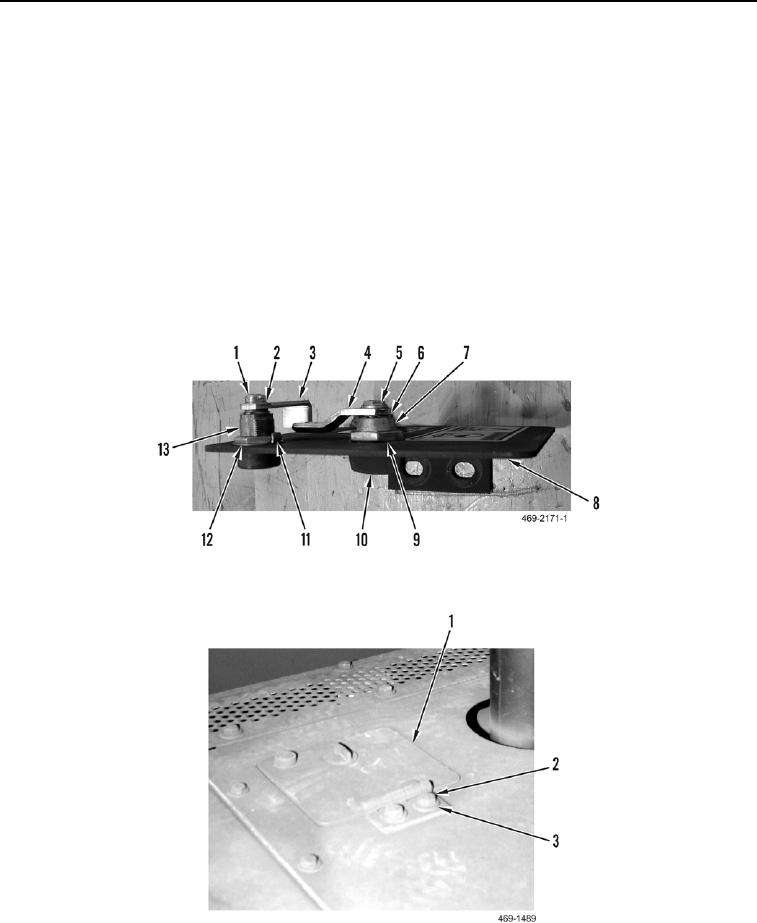
1. Install handle latch cylinder (Figure 19, Item 7) and nut (Figure 19, Item 9) on access door (Figure 19, Item 8).
2. Install handle (Figure 19, Item 10), detent washer (Figure 19, Item 6), latch (Figure 19, Item 4) and bolt (Figure
19, Item 5) on handle latch cylinder (Figure 19, Item 7).
3. Install locking latch cylinder (Figure 19, Item 13), locking tab washer (Figure 19, Item 11), and nut (Figure 19,
Item 12) on access door (Figure 19, Item 8).
4. Lock locking tab washer (Figure 19, Item 11) on nut (Figure 19, Item 12).
5. Install locking latch (Figure 19, Item 3), new lockwasher (Figure 19, Item 2) and screw (Figure 19, Item 1) on
locking latch cylinder (Figure 19, Item 13).
Figure 19. Coolant Tank Access Door Hardware.
0226
6. Install coolant tank access door (Figure 20, Item 1), two washers (Figure 20, Item 3), and bolts (Figure 20, Item
2), on engine enclosure.
Figure 20. Coolant Tank Access Door.
0226
END OF TASK

