
TM 5-3805-293-23-4
0211
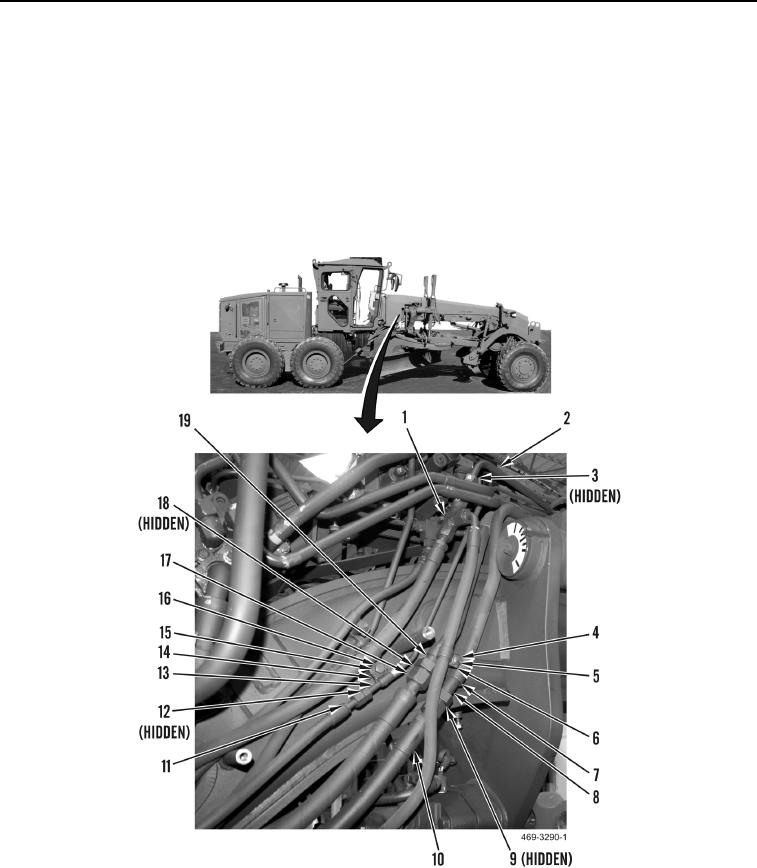
INSTALLATION CONTINUED
25. Install two clamps (Figure 38, Item 14), washer (Figure 38, Item 15) and bolt (Figure 38, Item 16) on tube
(Figure 38, Item 13).
26. Install new O-ring (Figure 38, Item 12) and connect hose (Figure 38, Item 11) to tube (Figure 38, Item 13).
27. Install three clamps (Figure 38, Item 7), spacer (Figure 38, Item 6), washer (Figure 38, Item 4) and new locknut
(Figure 38, Item 5) on two tubes (Figure 38, Items 8 and 19).
28. Install new O-ring (Figure 38, Item 18) and connect hose (Figure 38, Item 17) to tube (Figure 38, Item 19).
29. Install new O-ring (Figure 38, Item 9) and connect hose (Figure 38, Item 10) to tube (Figure 38, Item 8).
30. Install new O-ring (Figure 38, Item 3) and connect tube (Figure 38, Item 2) to tee (Figure 38, Item 1).
Figure 38. Right-Side Tubes.
0211
Change 1

