TM 5-3805-293-10
0027
REPLACEMENT CONTINUED
00027
2. Clean dirt and debris from shank.
WARN I N G
DO NOT allow shank to fall from scarifier frame. Failure to follow this warning may result
in injury to personnel.
N OT E
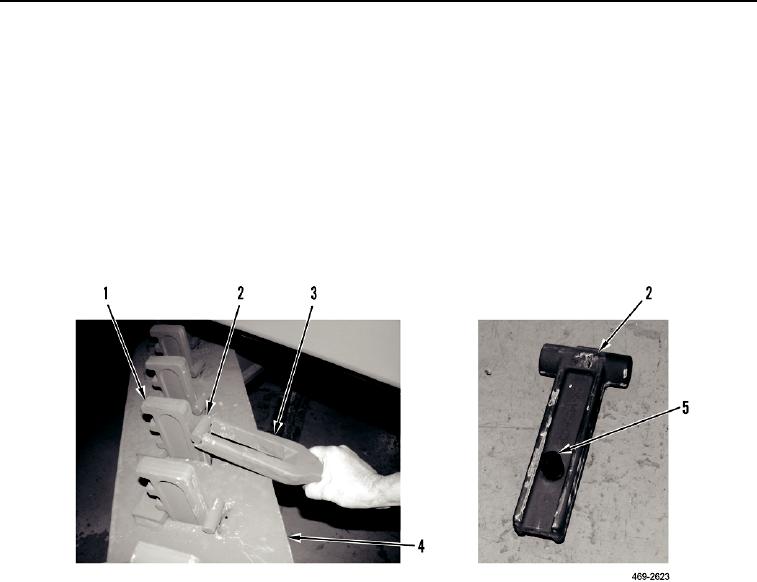
Be sure rubber grommet (Figure 3, Item 5) remains with lock pin.
3. Using tooth removing tool (Figure 3, Item 3) pry up lock pin (Figure 3, Item 2) and remove.
Figure 3. Scarifier Shank Lock Pin Removal.
0027
4. Remove shank (Figure 3, Item 1) from scarifier (Figure 3, Item 4).
5. Install shank (Figure 3, Item 1) on scarifier (Figure 3, Item 4).
6. Install lock pin with grommet (Figure 3, Item 2) on scarifier (Figure 3, Item 4).
0027-3

