TM 5-3805-261-20
SCARIFIER ASSEMBLY MAINTENANCE.
17-11.
Scarifier Assembly. (Sheet 9 of 9)
INSTALLATION
NOTE
Tighten bolts hand-tight only.
16.
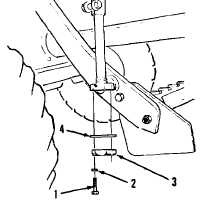
Install shim(s) (4), cap (3), two washers (2)
and bolts (1, Figure 17-34).
CAUTION
For proper final assembly, ball inside
cap must have free play (clearance)
of 0.015 to 0.045 inch after bolts are
fully tightened. Failure to obtain the
correct clearance could result in
damage to the vehicle.
17.
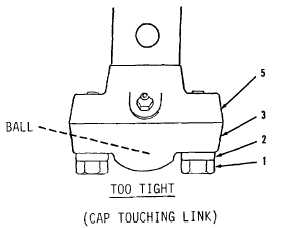
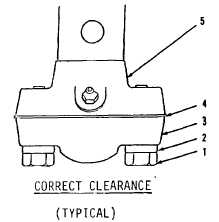
Tighten two bolts (1) evenly only until there
is no free play (clearance) between ball and
cap (3, Figure 17-46). Do not overtighten.
18.
Examine cap (3) and link (5) from the side.
If cap (3) is touching link (5), two bolts (1)
are too tight. Remove two bolts (1),
washers (2) and cap (3). Add one shim (4)
and repeat steps 16 and 17 until two bolts
(1) can be tightened far enough to remove
free play without allowing cap (3) to touch
link (5, Figures 17-46 and 17-47).
19.
Install cap (3), two washers (2) and bolts
(1).
NOTE
Return
130G
Grader
to
original
equipment condition.
Figure 17-34.
Figure 17-46.
Figure 17-47.
End of Task
17-37


