
TM 5-3805-293-23-4
0185
REMOVAL CONTINUED
N OT E
Tag and mark wires to aid in installation.
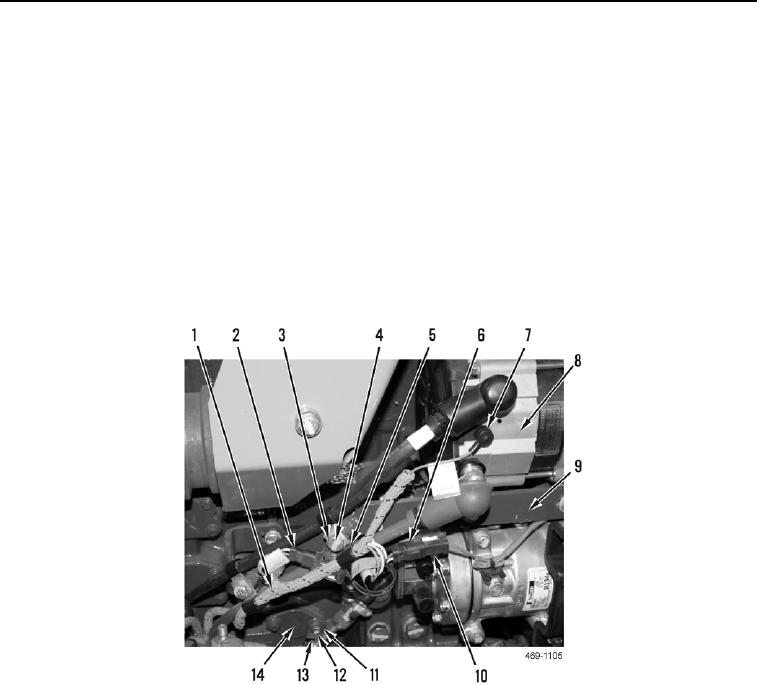
3. Disconnect alternator connector (Figure 2, Item 7) from alternator (Figure 2, Item 8).
4. Disconnect rear chassis harness (Figure 2, Item 1) from A/C pressure switch connector (Figure 2, Item 6).
5. Disconnect rear chassis harness (Figure 2, Item 1) from A/C clutch solenoid connector (Figure 2, Item 10).
6. Disconnect rear chassis harness (Figure 2, Item 1) from A/C low pressure switch connector (Figure 2, Item 2).
7. Remove two bolts (Figure 2, Item 4), washers (Figure 2, Item 3), and clips (Figure 2, Item 5) from bracket
(Figure 2, Item 9).
8. Remove bolt (Figure 2, Item 12), washer (Figure 2, Item 11), and clip (Figure 2, Item 13) from engine block
(Figure 2, Item 14).
Figure 2. Rear Chassis Harness to A/C Connections.
0185

