TM 5-3805-261-23-2
HYDRAULIC CONTROL VALVES REPAIR - CONTINUED
0332 00
ASSEMBLY - CONTINUED
25.
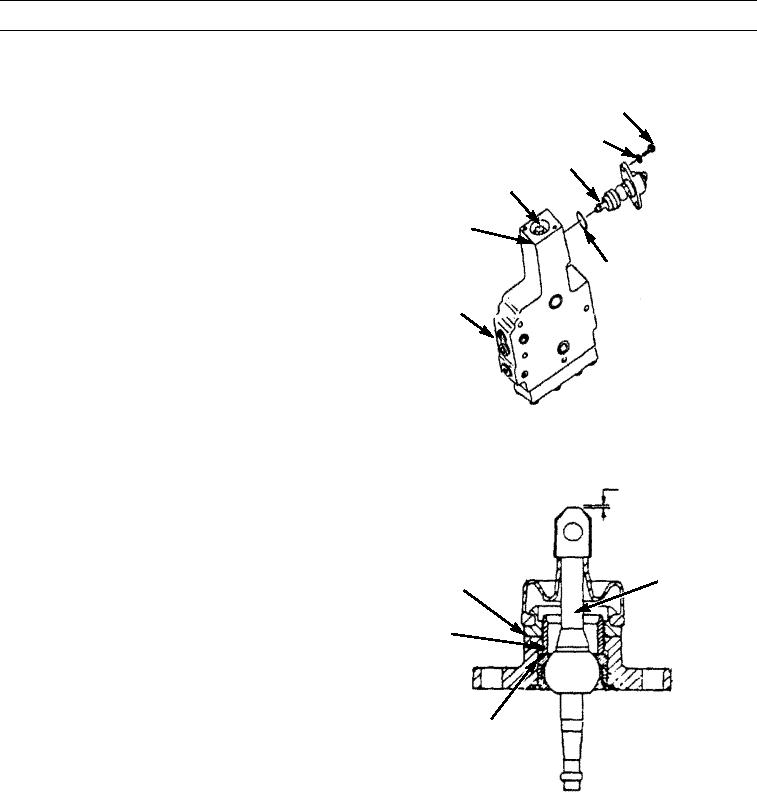
Install new preformed packing (17) to lever (16) assembly.
26.
Position lever (16) assembly to valve (8) assembly.
15
Insert end of lever in hole valve (26).
14
27.
Install two washers (14) and bolts (15).
16
28
NOTE
Perform steps 28 through 30 to adjust
26
end play of valve.
While moving lever (16) back and
forth slightly, tighten plug just until
17
there is no play. Do not overtighten
8
plug.
28.
Tighten plug (28) to remove end play of valve (26).
397-1568
29.
With nut (22) loosened, rotate ring (23) until it con-
END PLAY
tacts bearing (18), then turn to left 45 degrees to obtain
0.006 IN. (0.15 MM)
lever (16) end play of 0.006 in. (0.15 mm) using dial
indicator.
30.
Hold ring (23) and tighten nut (22) to 25 lb-ft (34
Nm).
16
22
23
18
397-1564
0332 00-14

